One of the items that may end up at the bottom of the "to do" list in restoring a Letter Car probably would be the Dash Clock. After all of the mechanical, body, trim and interior are completed, you now start looking at the minor items. The Clock is one of these minor items to do. If the clock in your car is working, then just leave it alone. If the clock has not worked in a few years then this may help in the restoration process.
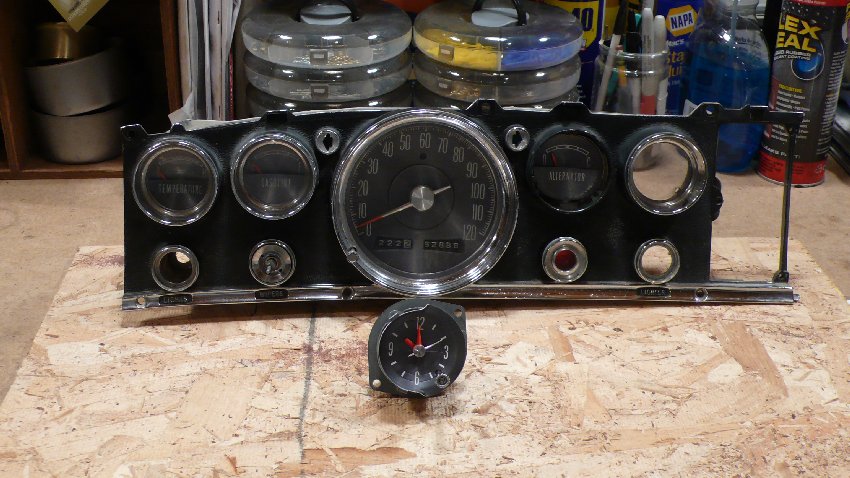
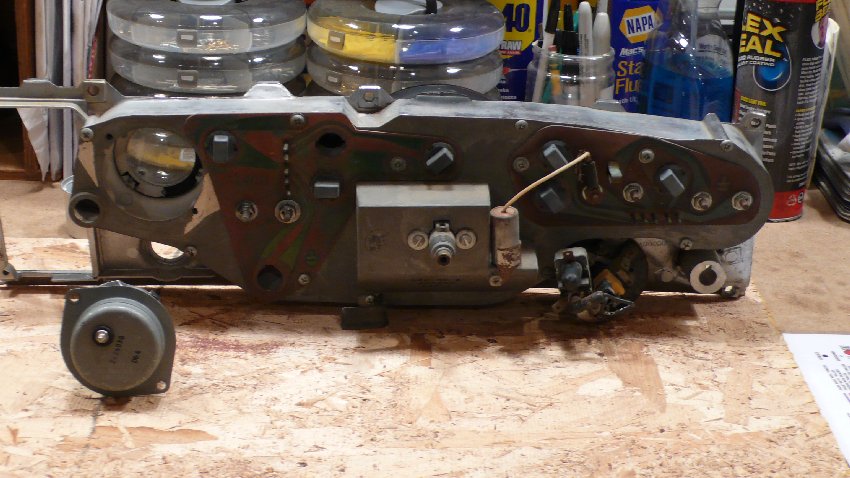
Probably the most difficult part of this project is removing the Clock from the Instrument Cluster and after cleaning and lubrication of the mechanical components then reinstalling the Clock. A great help in this process was that I had purchased some time ago a donor car Instrument Cluster. This gave me some guidance as to how the Clock was physically attached. I have placed pictures of the front and back of the Instrument Cluster showing the two screw holes that hold the Clock in the right side of the Cluster. The two screws and the power strap nut are all that needs to be removed. Getting to this point is a long story.
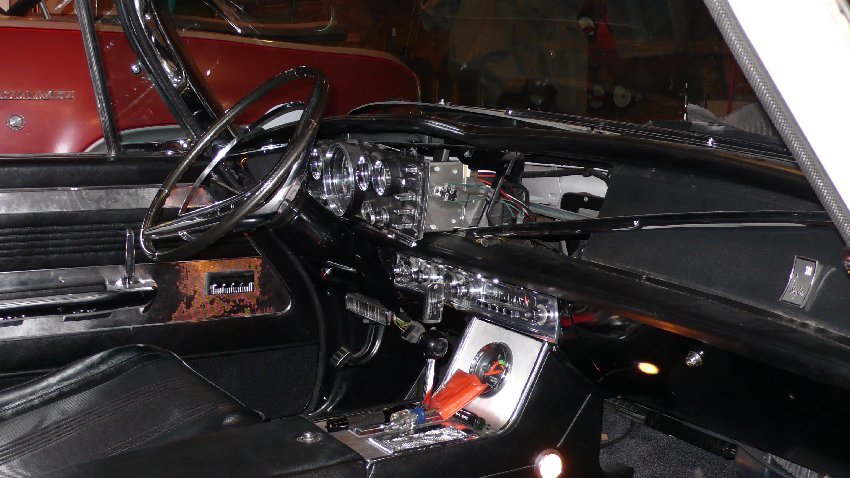
I tried to find a way to reach the screws and power strap from underneath the dash. This was nearly impossible. The next attempt was to partially disassemble the dash front. First I removed the two chrome strips that are to the right of the radio (6 screws in all). This let me remove the 4 screws that hold the metal radio grill and removed the grill. At this point I removed 4 screws that hold the speaker to the speaker frame and removed the speaker by unplugging the 2 plug wires. The plugs are distinct so that replacing them later would be easy to identify. Now I had to remove the bottom three screws at the bottom of the instrument Cluster, and the 3 screws that hold the painted plate under the dash eyebrow, this revealed three more screws that hold the top of the Instrument Cluster to the dash frame.
Now I could move the Instrument Cluster, but the movement was limited. I next removed the three screws that held the H/AC control panel in the Instrument Cluster. You do not have to remove this assembly, but loosening it will make it easier to work behind the Cluster. I still could not pull the Cluster out very far and realized that the Speedometer cable was restricting movement. By reaching in thru the speaker hole I was able to unscrew the cable. Now I could pull the Cluster out by about three inches and see the power connection and the two screws that held the Clock in place. You do not have to unplug or remove any wiring behind the Cluster at all. Just leave everything else in place.
You will have to remove the knob from the front of the clock with a small flat blade screwdriver (eyeglass Size) from the center front of the knob. Then remove the two screws on the clock case and the power strap. The plastic lens stays with the Cluster (good time to clean it) and then the clock is removed. Once the clock is working the reverse procedure will return the dash to original condition.
This is what the dash will look like at this point.
First you will have to open the three crimp points that hold the clock mechanism in the case. I worked very carefully using a least four different pliers to complete this. Then the Clock mechanism is free from the case. Interesting to note that the clock mechanism and orientation in the Cluster only fit correctly one way. You do not have to mark or visualize the orientation for reassembly. Next I moved into the kitchen for the oil change and lube job.
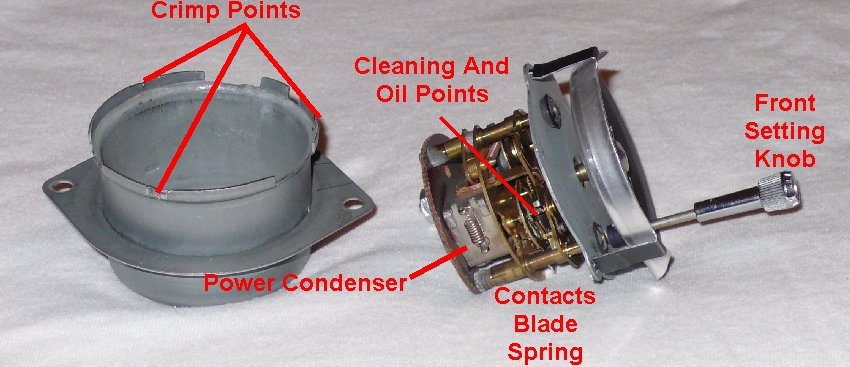
First I placed the mechanism so that the shafts went horizontally and the clock face was vertical. Then I used one of the Syringes filled with Alcohol to carefully touch every shaft and bearing point for cleaning. I repeated this three times and noticed that I could now move everything (contacts, metallic blade and setting knob) freely. It really did not take very much Alcohol for this. Then I set it aside for the night to dry. The next morning I used the other Syringe filled with a very light oil (sewing machine oil or equivalent) and repeated the process touching each shaft and bearing point very lightly with oil. I had practiced pushing the Syringe handle so that only a small amount of oil came out at each point. I did not want to have any excess or overflow. Worked really nice. The contact arms and escapement worked very smoothly and when opened the attached spring worked the escapement beautifully. The second hand moved correctly for about 15 seconds until the spring was retracted and the contacts were closed again. I could repeat this process by moving the blade up. This stretched the spring that made the escapement move the clock hands.
Now it was time for the acid test by using jumper wires connected to the battery and the clock sitting on the fender. I found out that the small metal can at the back of the mechanism acted like a capacitor and was energized when the contacts closed, it reset the metallic blade by flipping it up fully and opened the contacts again. This placed the tension on the spring in the clock back and allowed the escapement to continue moving correctly. The process was repeated about every 15 seconds. After 30 minutes of watching this I then replaced the clock back into the case. Placing the clock mechanism back into the case and then placing this in a vise protected with a rag and lightly tapping with a chisel the three crimp points put everything back just like new. Then I rebuilt the dash and everything was done. I have noticed that the clock gains about 15 minutes every month, have heard that by resetting the time back by 12 hours will change the timing on the clock. Will work on this on a warmer day.
The tool list is fairly small. A stubby Phillips screwdriver, a medium Phillips screwdriver, a 1/4 inch nut driver, a small flat bladed screwdriver, two 1 1/4 inch long syringes (scrounged from my dentist), Alcohol and light weight oil. Overall this took part of two days. Now I could probably do the job in a good afternoon.
Helpful Hints: It helps to have a multi chambered holder (egg carton or ice cube tray) for the screws as you remove them. Just don't place this on the floor where it will eventually be tipped over by your foot and you will be left with a pile of un-sorted screws. I found it very handy to use magnetized screwdrivers to hold the screws when replacing them (I dropped 3 down into the area behind the dash and on top of the radio. They are still there). The center console makes for a very nice seat while working, I covered the seats and console with a patio seat cover.